
Last Updated on October 26, 2023
Editing Anki templates is the most important change that affects the way your notes and cards look. Here we can add fields, decide, how many cards have our note. We can also add a opportunity to type the answer.
All posts about Anki
Part 1. Studying
Part 2. Editing a deck and notes
Part 3. Creating new notes
Part 5. Сloze with typing
Part 6. Add a pronunciation
This guide has been updated for Anki’s new design. The old version is not much different. For more important differences, the old version is hidden under spoilers. In the new version, you can click the “Downgrade” button in the “Profiles” window. But in terms of design, the new version is better.
Fields
First questions – how many fields I will have. I think, for German I need certainly not only word and translation but also grammar forms. So I need at least 3 fields.
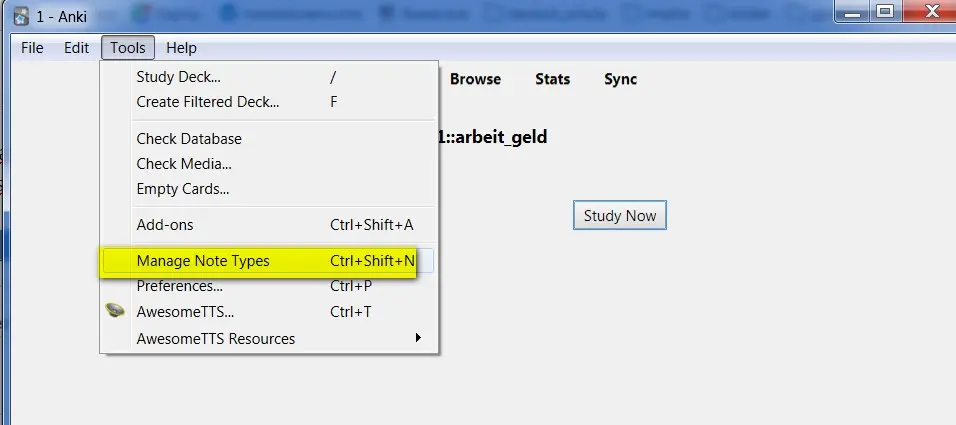
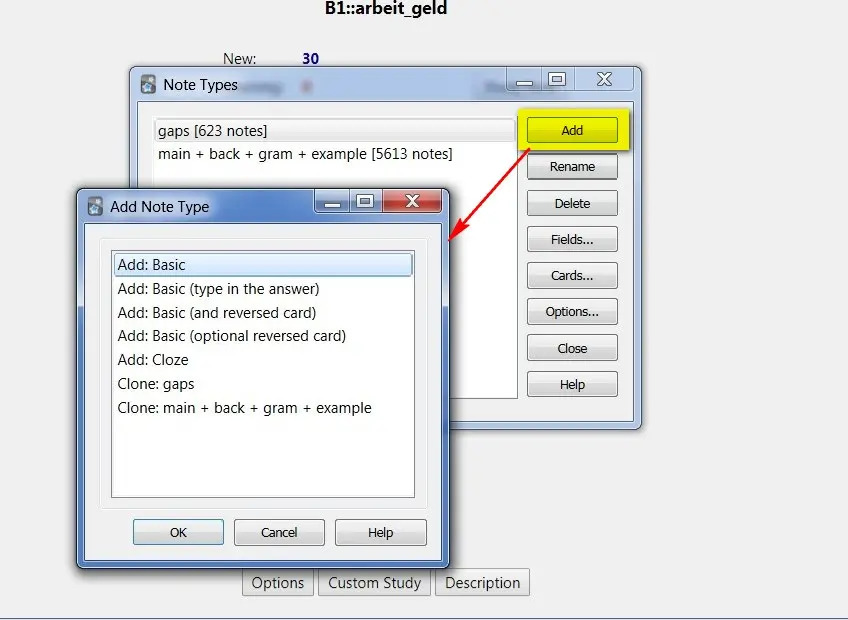
But at first I must set new note type. I go Tools / Manage Note Types. Then Add. Since I will 3 fields, I choose Basic (and reversed card) and give a good name, that shows what is important in this template.
About template Cloze I will talk in the next posts.
Then I click on my new template and further Fields. I add as many fields as I want.
In my case I will Question (German word), Beispiel (german sentences), Grammatika (der/die/das, n-Deklination, strong verbs, verbs with sich, prepositions etc.), Answer (translation), comment – additional information, for example about synonyms.

I can change an order (Reposition).
Important: what field is for sorting (Sort by this field in the browser).
Anki Templates
We go to Cards.
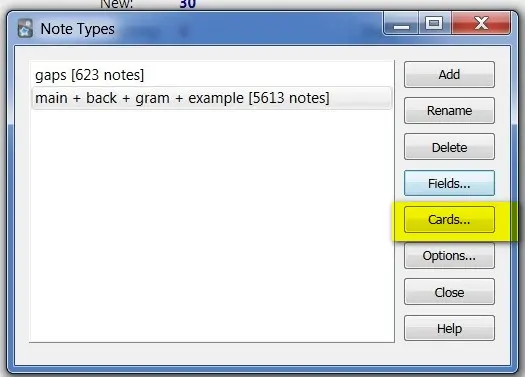
This is our templates.
From here there is larger difference between old and new versions, therefore old version is under the spoiler.
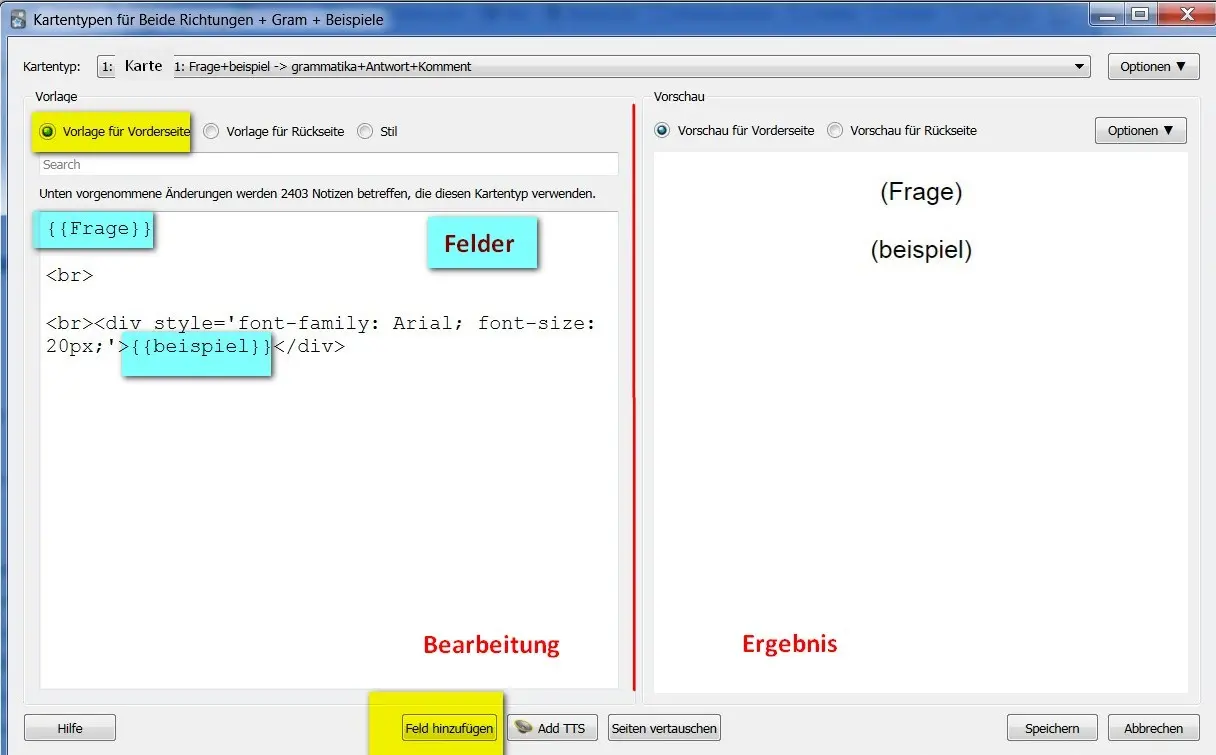
On the right – preview.
Above – what we see on the front side of the card. Below – what we see on the back side.
On the left: editing. In the middle there is styling, that is common for all my cards in this template.
You can use html, for example:
<br> – indention (paragraph)
<hr> – linie
{{field’s name}} – you can add a field, click on the orange button below. But you can choose only the fields, which you create a step ago. You can also use default fields such as FrontSide.
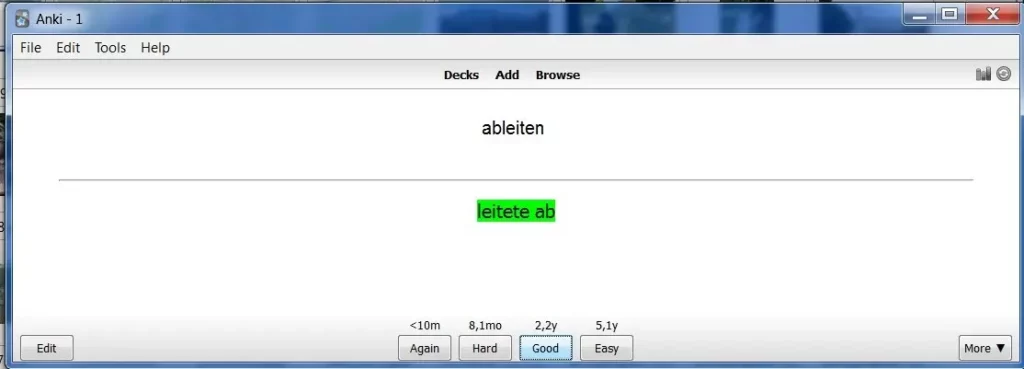
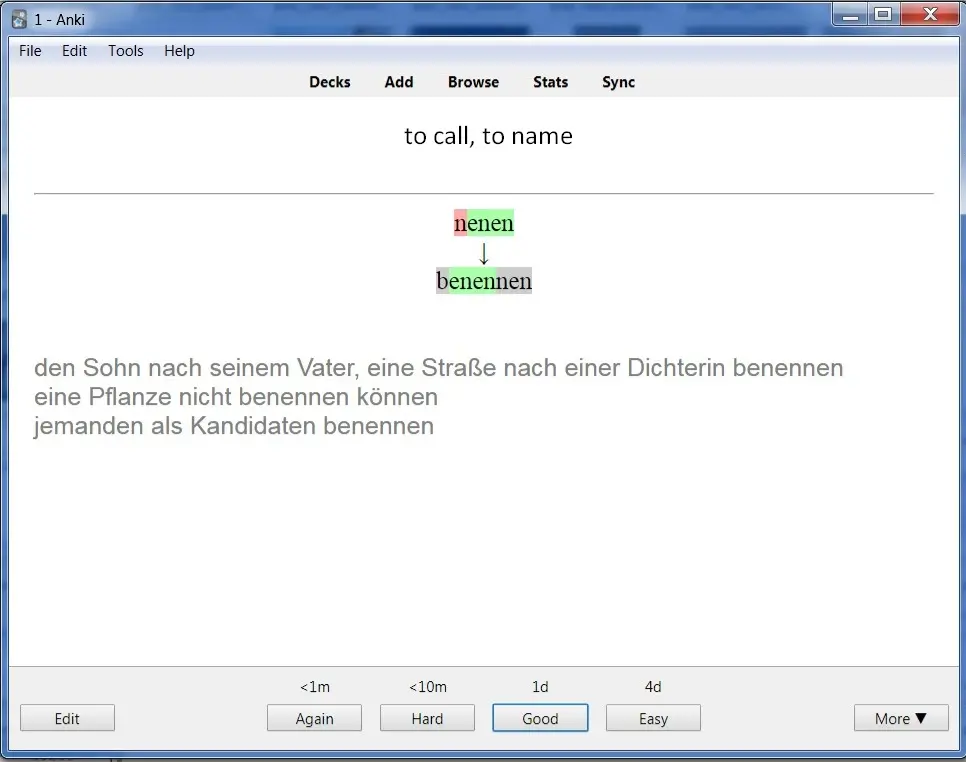
In this template is all simple: Anki shows me German word (Question) – I remember (or do not remember) translation and by clicking see an Answer.
Front side of the card 1.
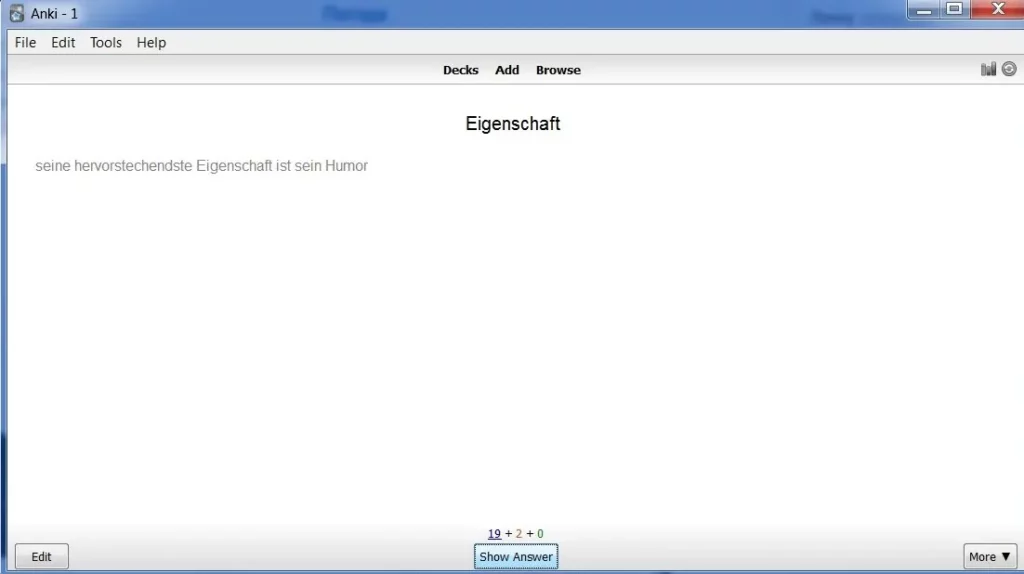
I click Show Answer, receive back side and decide, how good I know it.

First reversed card
This card shows me translation and I must remember German word.
But I will also type this German word. Typing is very good for my memory. Therefore I add a default field type:name of a field. German word is Question field, therefore I write {{type:Question}} (blue). Not forget blue code in styling.
If you don’t need a typing, you can write simply your own field’s names as we did it on the card 1.
Preview shows me, how wrong answer looks like. Right answer is green.

Second reversed card
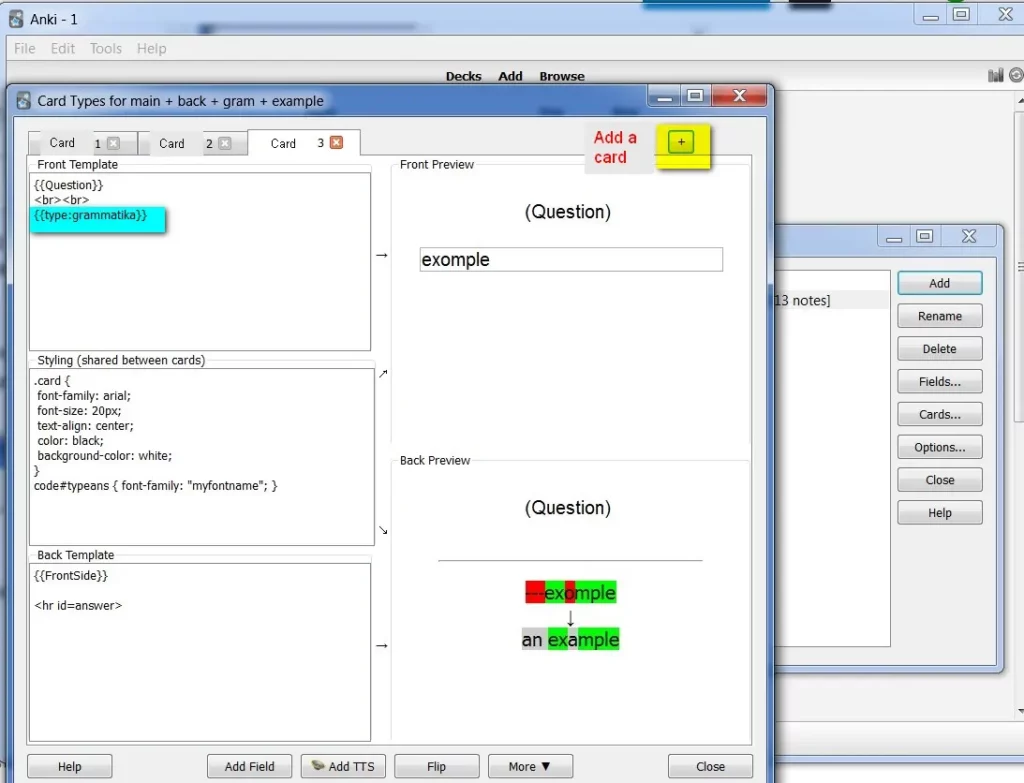
Finally, I want another card for reviewing grammar, and also with the opportunity to type a word. The grammar card is exactly what I missed in other programs.
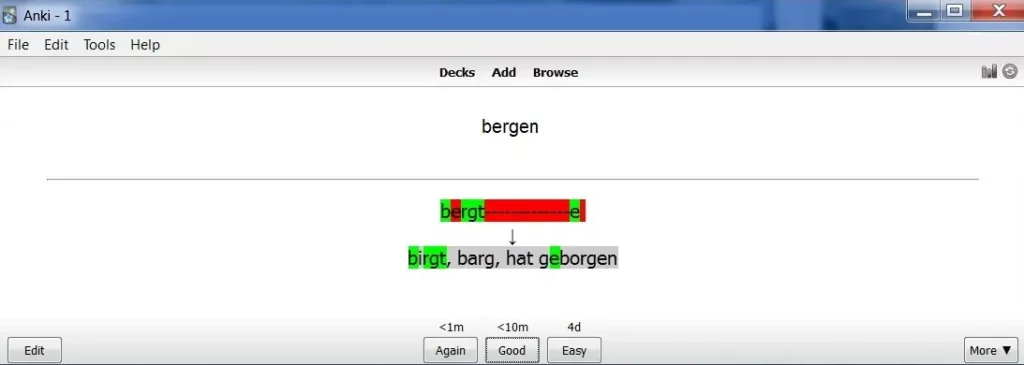
Plus button – add a card. This time I write {{type:grammatika}}.
On this card there are no additional fields, only German word and its forms.
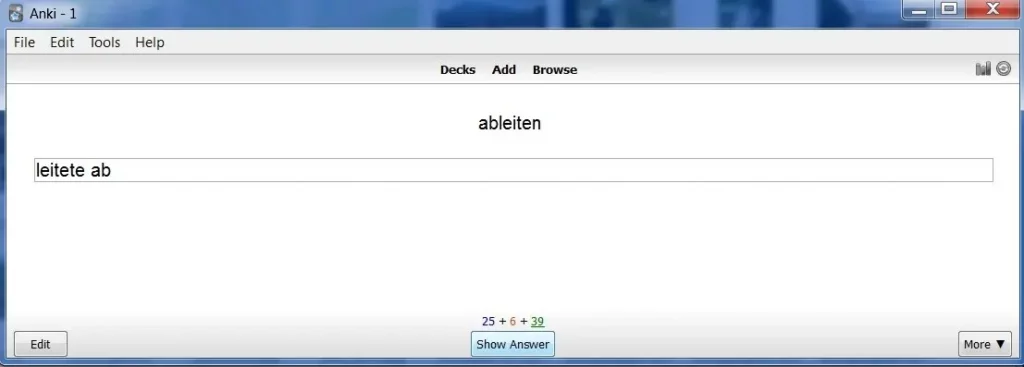
This is how it will look by learning.
I was right:
And here a wrong answer:
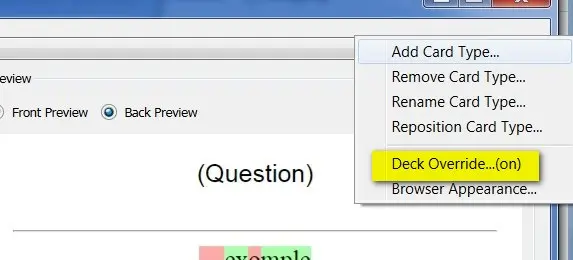
More button below gives some options: rename, reposition, deck override (if you want, that your card goes to certain deck).
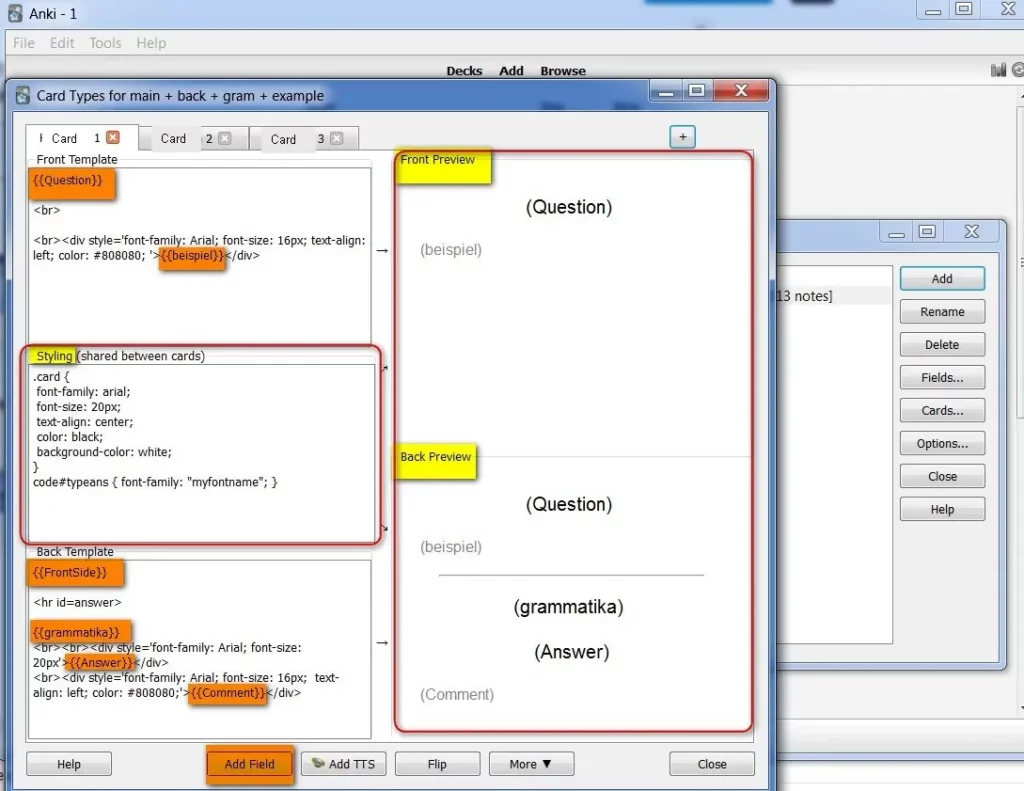
New version looks like this.
On the left half of the page is my editing, on the right is what it will look like. In the new version, the design has been simplified, you can better see what you are editing.
Editing consists of three parts, each hidden on its own button on the left:
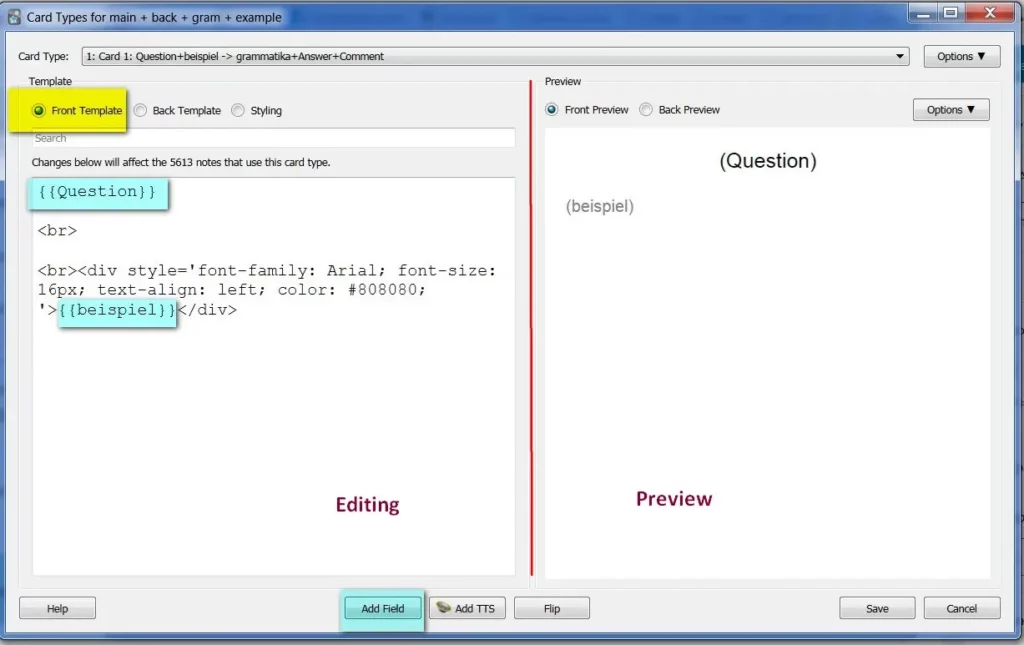
Front Template (question, on my card it is German),
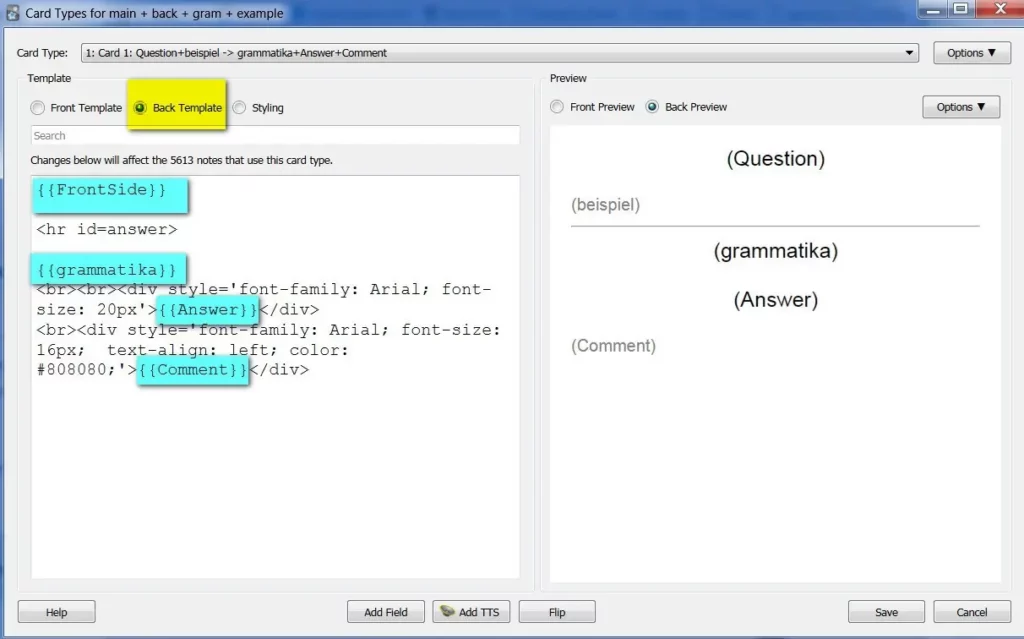
Back Template (answer, on my card it’s translation),
Styling
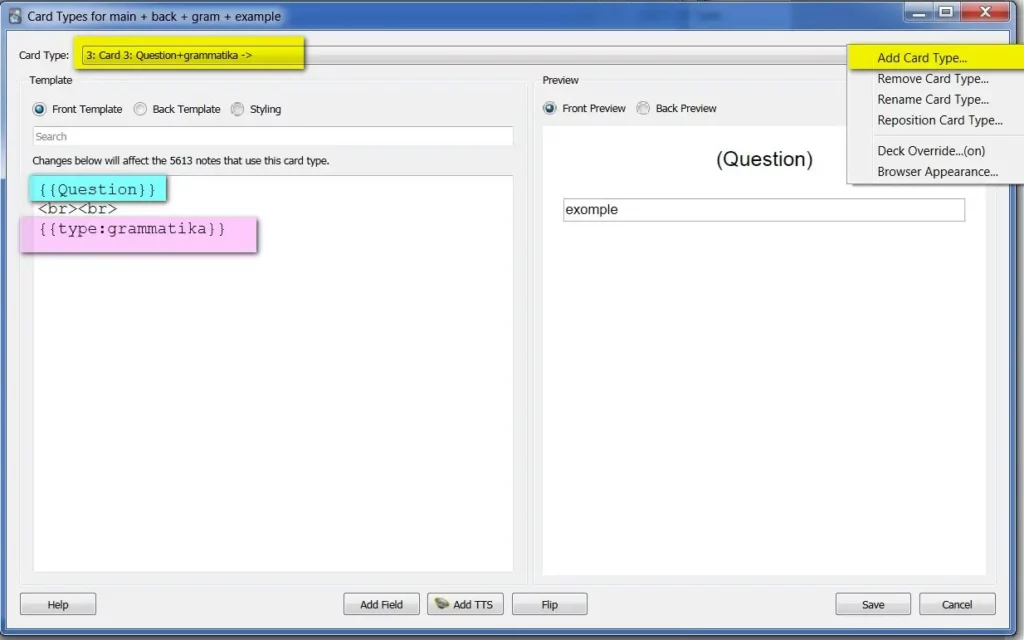
The first is the front, so that’s the question we’re asking ourselves.
To add the Field you should click the Add Field button below. It is logical that this will be the root word. I have this field called Question. The fields are in brackets.
I also wanted to have examples of the use of this word so that I could remember not only the basic meaning but additional ones as well. So I added example (beispiel) and style field in HTML so the examples are not too flashy.
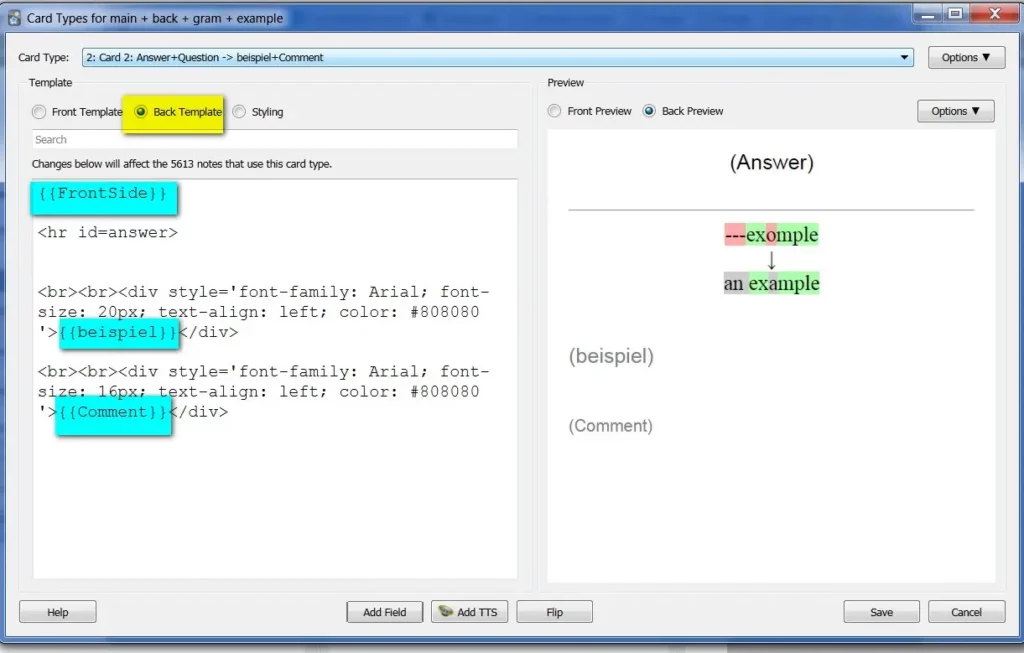
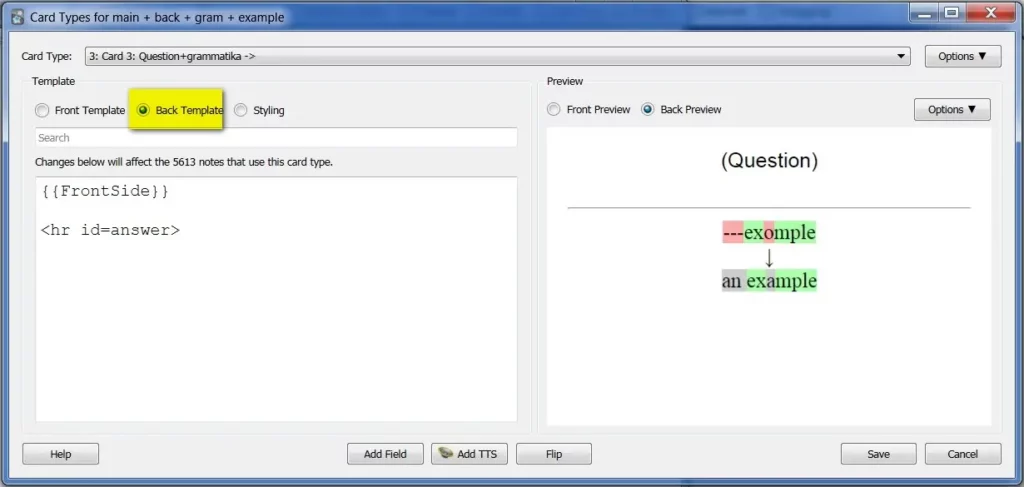
Now the back. What do I see when I click Show Answer?
Above I see a repetition of the question – this requires the FrontSide field. Next comes the line break (<hr>) and my personal field with grammatical forms. You can make no personal fields.
The third button is a style sheet so those who know HTML can edit the look.
First reversed card
Next I need to make a reversed card. After all, I don’t just want to learn from German into my mother tongue, but also from my mother tongue into German.
Since I chose the “Basic (and reversed card)” type, I already have the second card, I just need to fill with the fields I want to see there.
You can change the card above. If you don’t have a reversed card, you must add a card via the Options button above.
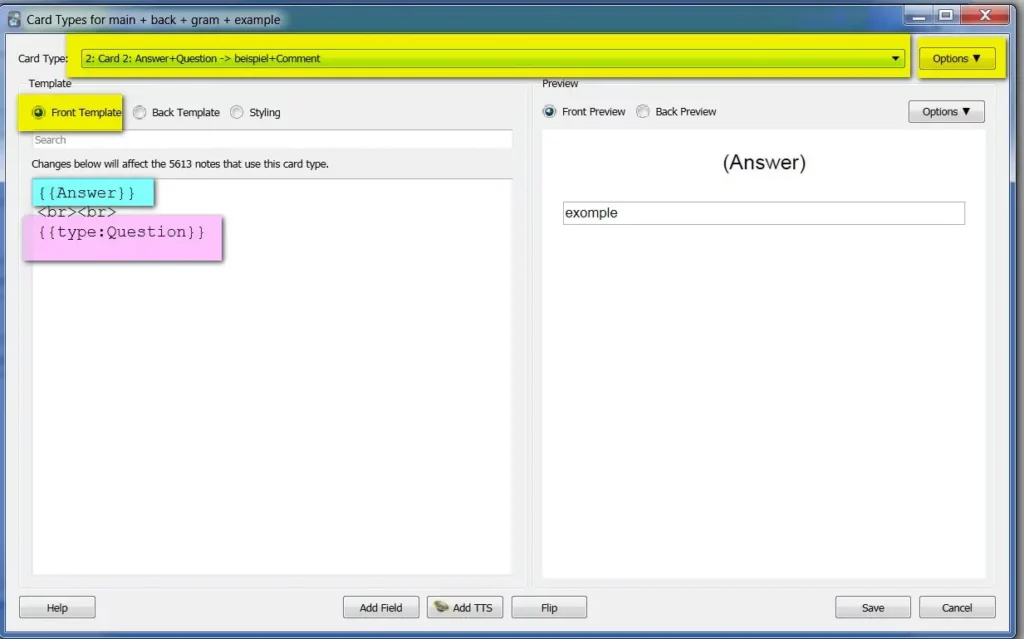
Like by the direct card, there are three buttons – Front Template, Back Template, Styling. Because it’s a reversed card, it’s an Answer instead of a Question.
I want to add also the ability to type the answer, so I’ll add the “Type” (rosa) line. There is the field with which the typed word (question) is compared. If you don’t want to type, you don’t need this line, just your fields.
Back. The words exomple – example are here because I added typing.
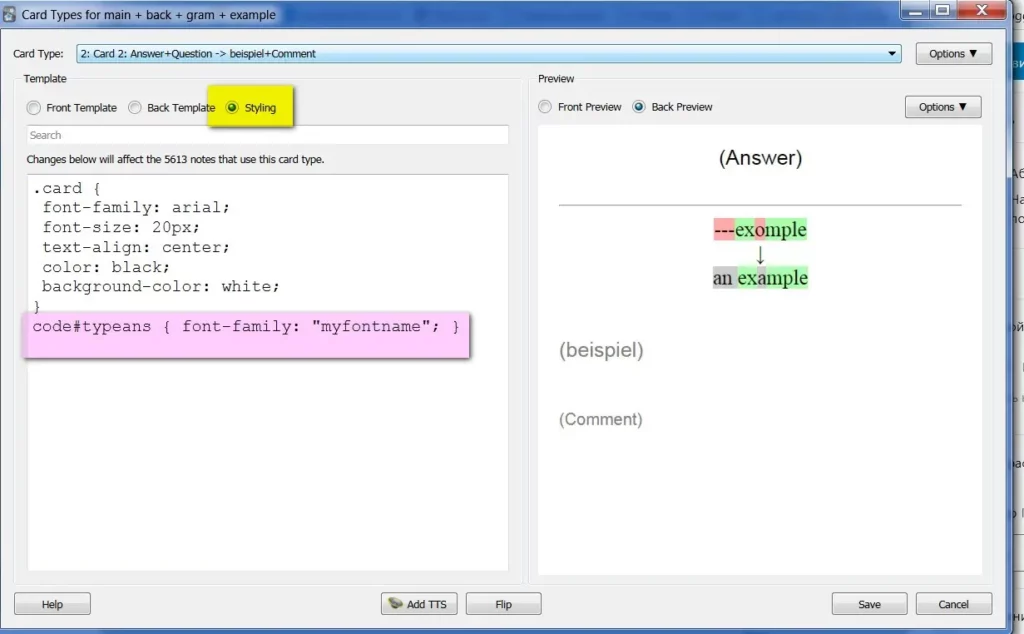
In order to be able to type a word, an additional line is required in the Styling button.
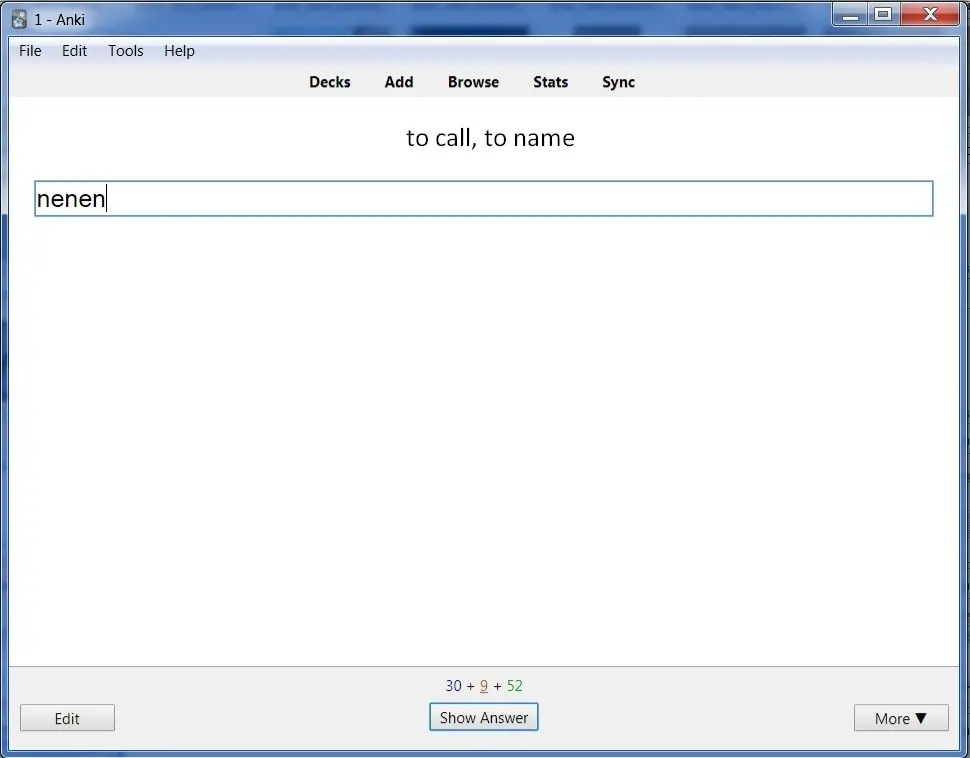
This is what learning will look like. Left is what I typed, right is the answer.
Another card with grammar
At last I want another card just to review the grammar and with the option to type the word. The grammar map is exactly what I was missing in other programs.
I can arrange it in a simple way: show a question – show an answer. But I want to type words. Mechanical memory is a great thing. I add a card in Options and and do the same as on the reversed card, only the fields are different.
It’s more convenient for me if the third card goes straight into the grammar deck. To do this, I need to click the Options – Deck Override button at the top. In the old version there was a More button at the bottom.
Other posts about anki – #Anki. Next – template Cloze.
Do you enjoy the site without cookies and maybe without ads? This means that I work for you at my own expense.
Perhaps you would like to support my work here.
Or Cookie settings change: round sign bottom left