
Last Updated on October 9, 2023
I have made further Bascetta star instructions as detailed as possible, because this part is difficult and is very vague on the Internet-instructions.
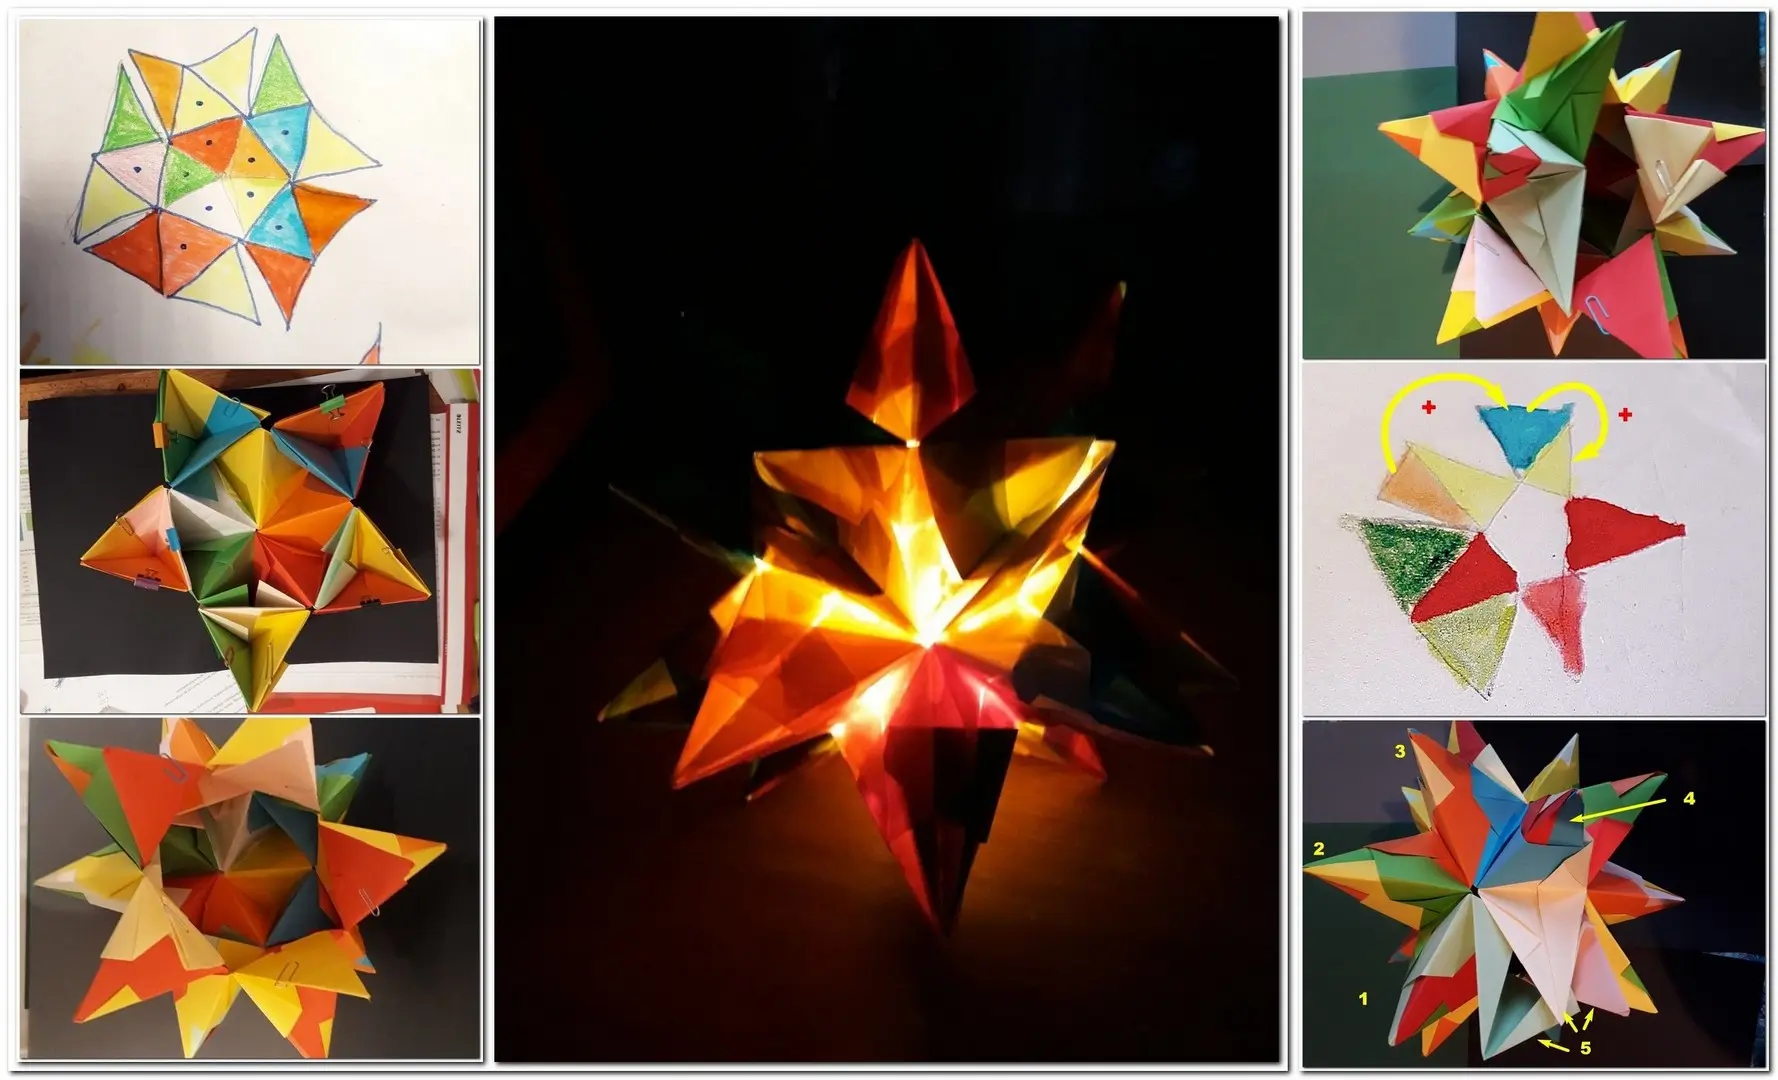
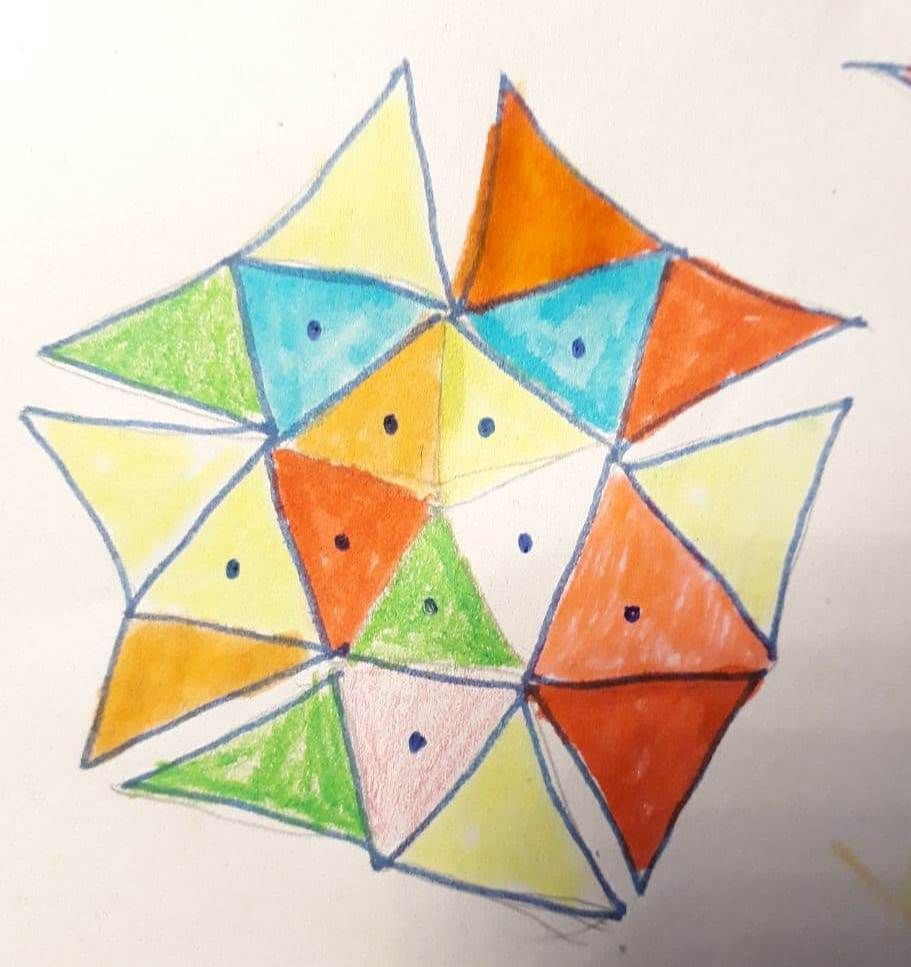
First part of Bascetta star instructions.
Feasts in Germany. December – January
Simple Christmas decoration ideas
DIY silhouette lantern for Saint Martin feast. Part 5
DIY lantern for Saint Martin feast. 4. “Drums” and “Houses”
Carnival vocabulary
What is Wichteln
School cone in Germany (Schultüte). History and list
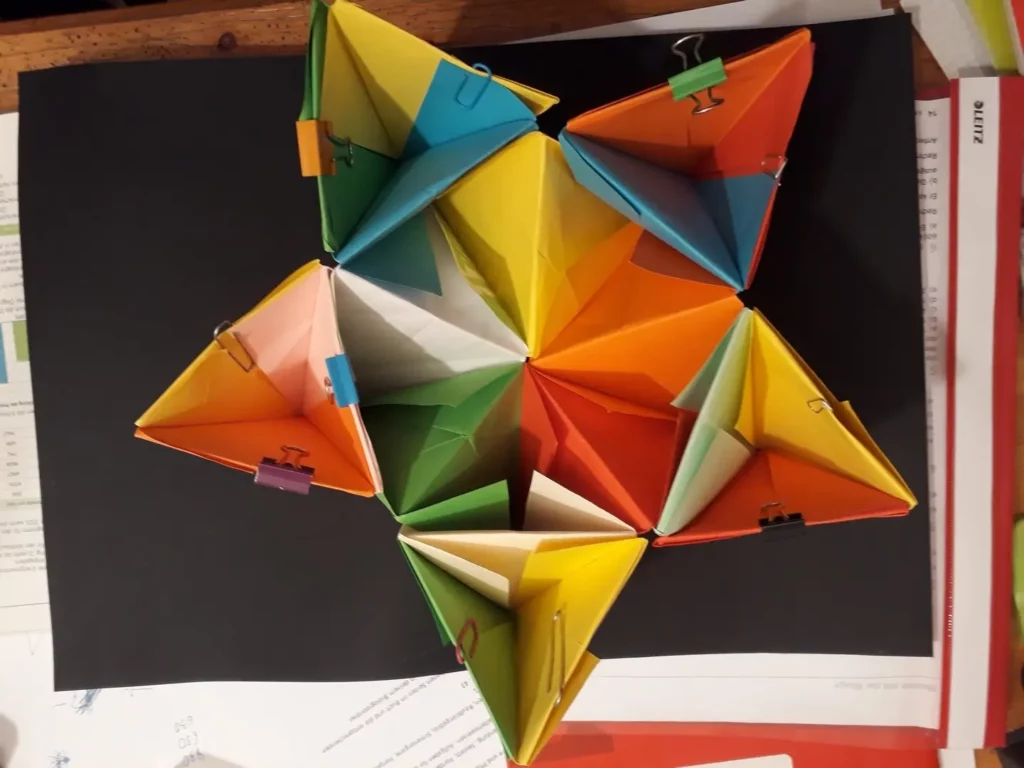
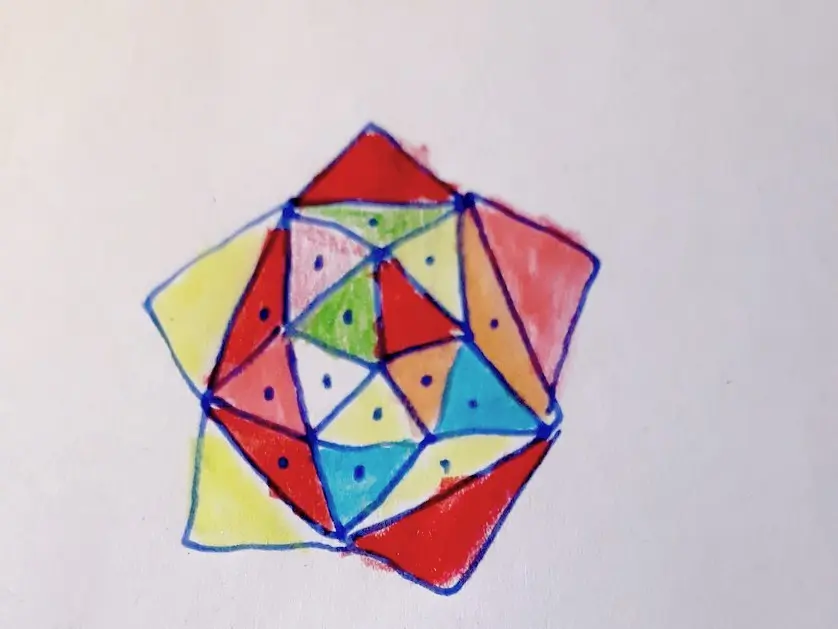
Next step. We add two new modules to each free half of the our 5 module and get 5 new points.
The view from below. Here the free module halves were fixed upwards.
The module halves are shown on the diagram.
Subtotal: we have 10 points, 10 free module halves. 20 modules were already used. There are still 10 points and 10 modules.
Further on, our star does not become flat, so you should slowly remove the fixings.
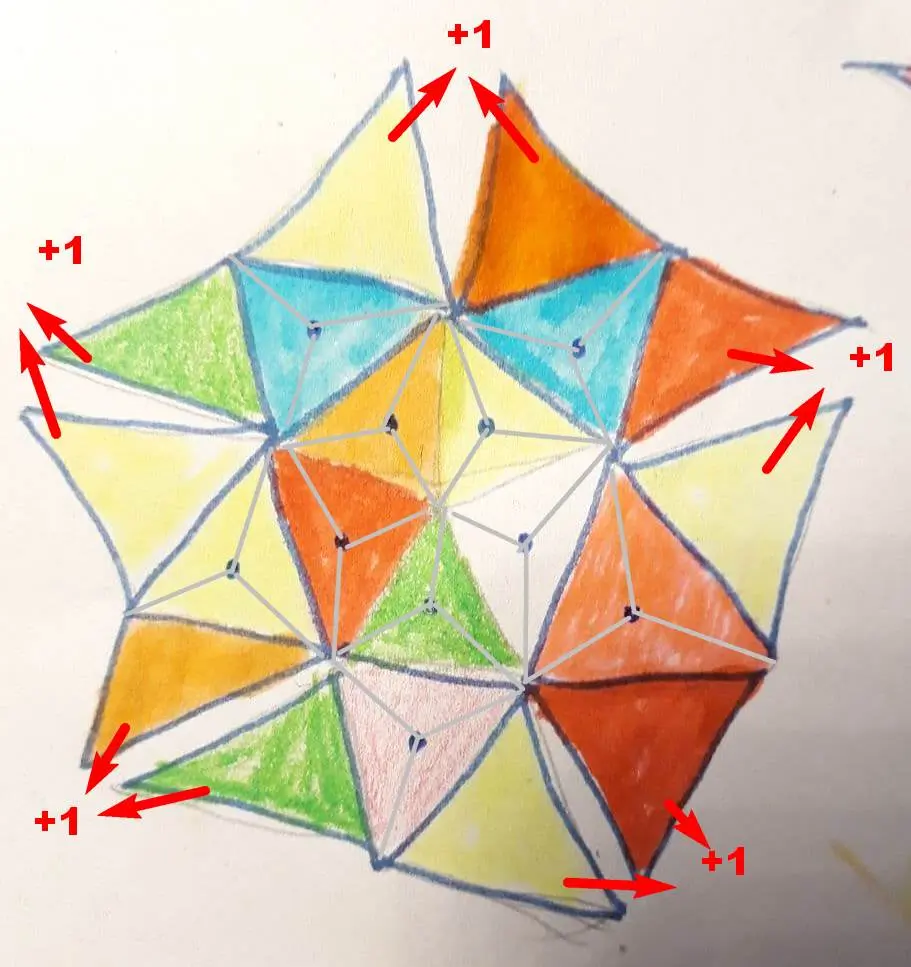
Next step: we use 2 old module halves of two adjacent points and add 1 new module to make a new point. And so 5 times.
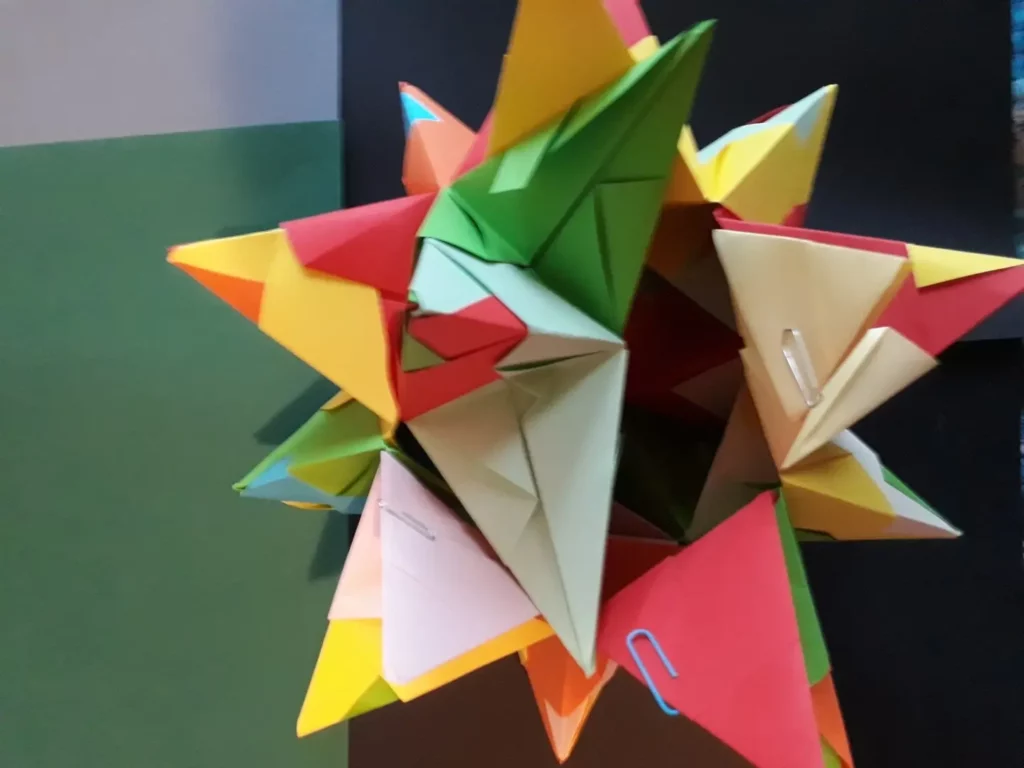
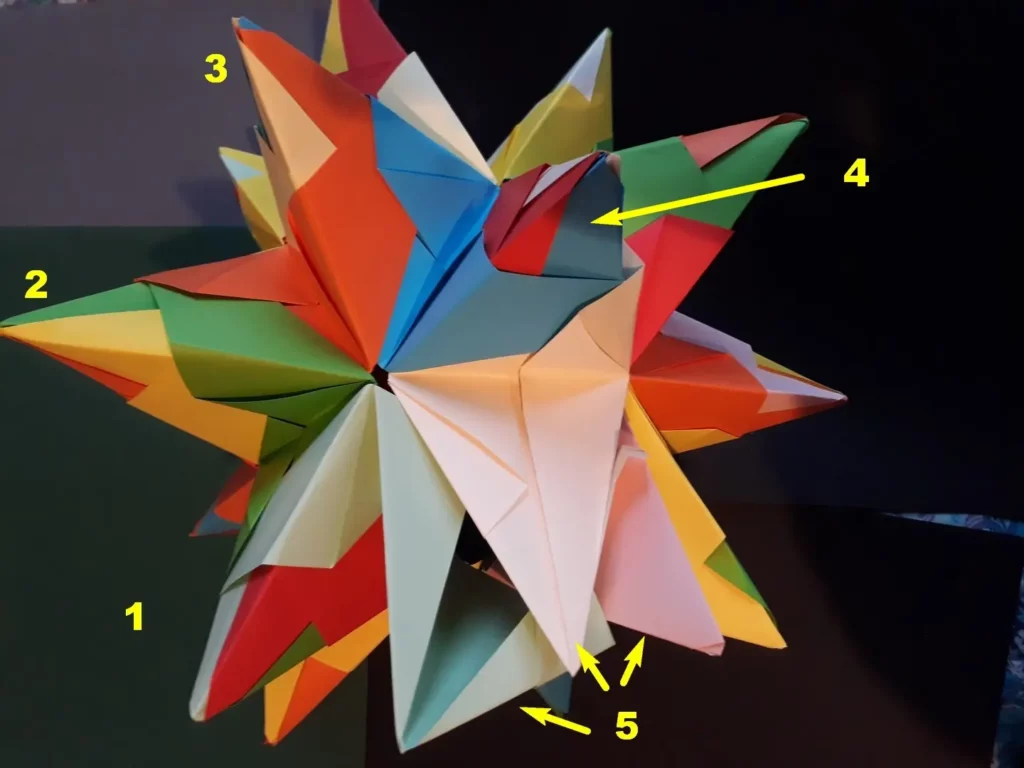
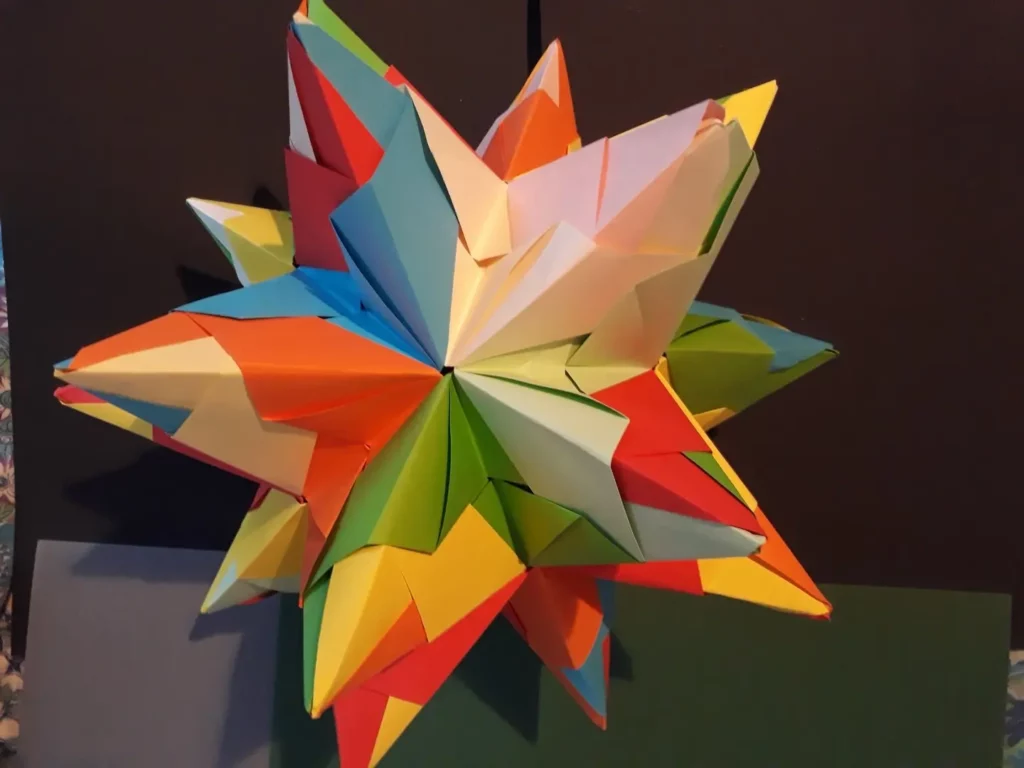
We get that in the end.

From above
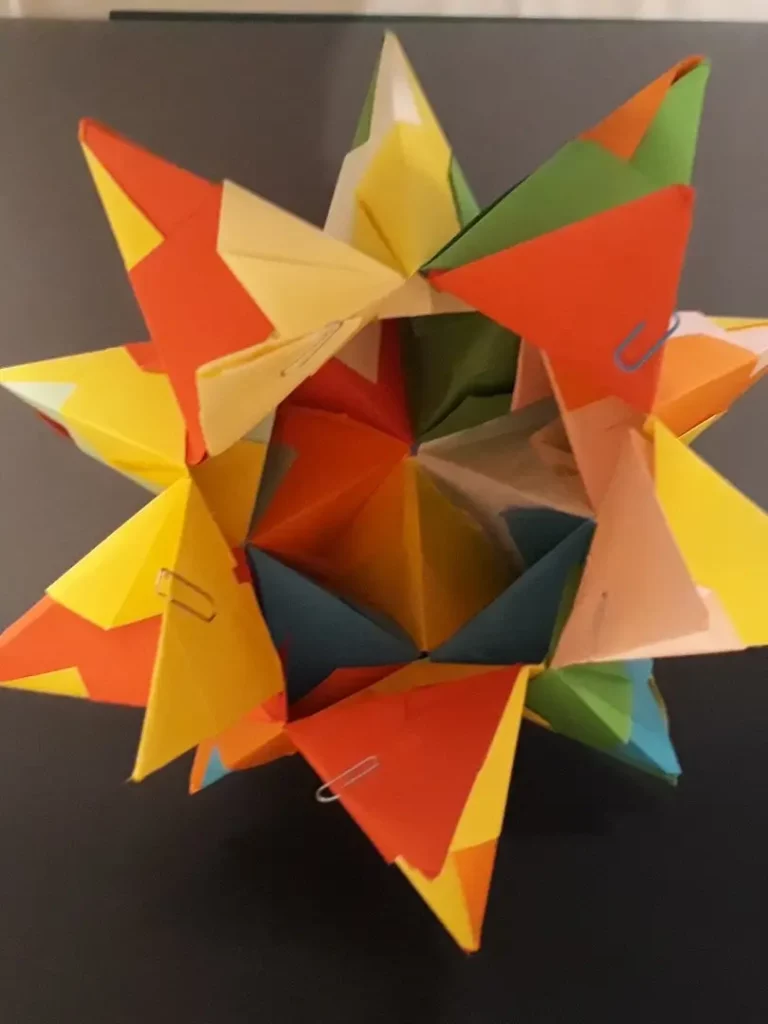
And now the last five points. It is relatively easy for me because I have different colors. Instead, you can use different paper clips for labeling.
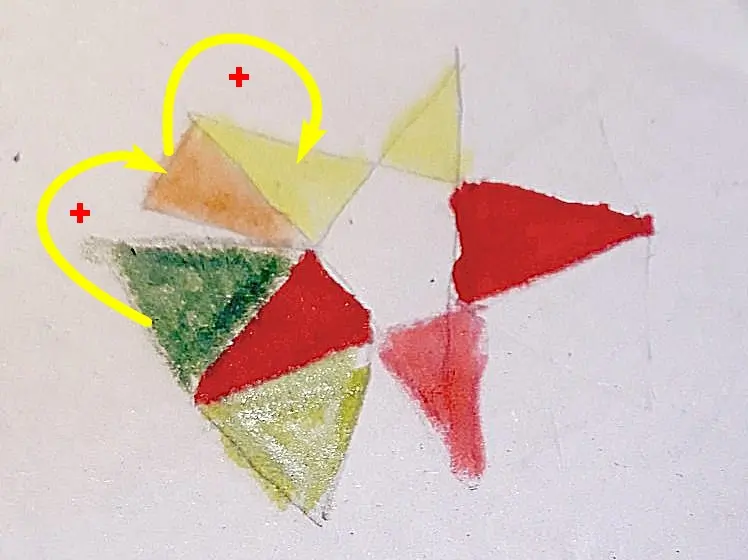
I take one module half (e.g. lower red) and add 2 new modules (green and light green). So plus a point.
So that old points don’t disturb us on the scheme, we simply draw our 5 free module halves.
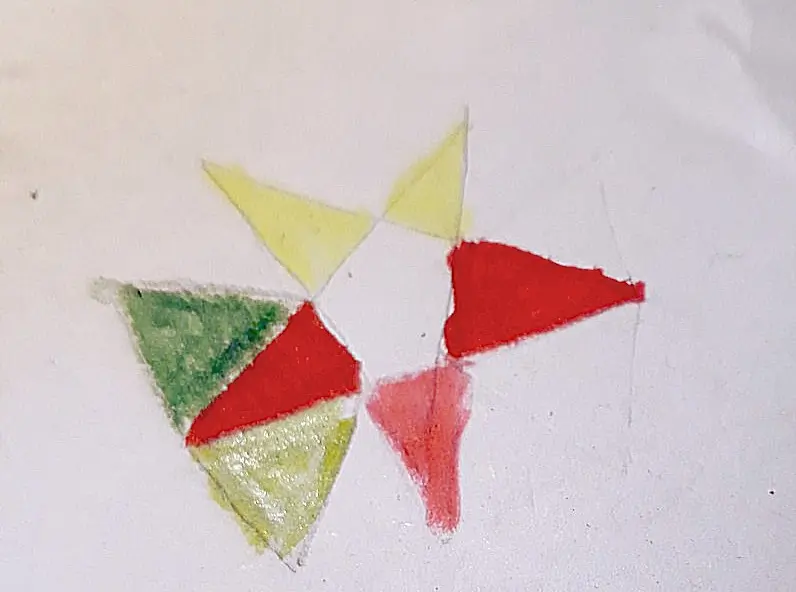
Next point: second half of the green module that I just used + nearby yellow half + new orange module.
Third point: we take the orange half of the module we have just used + old yellow + new blue.
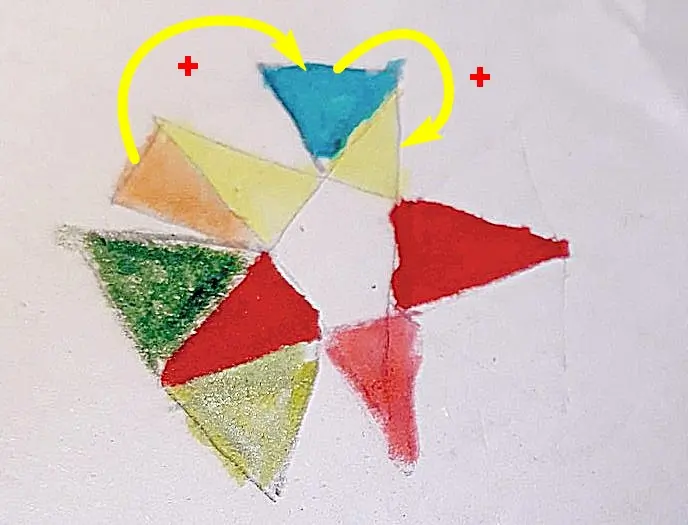
Fourth point: just used blue module half + old red + new light yellow.
Fifth point: we are using three halves of modules that we already have.
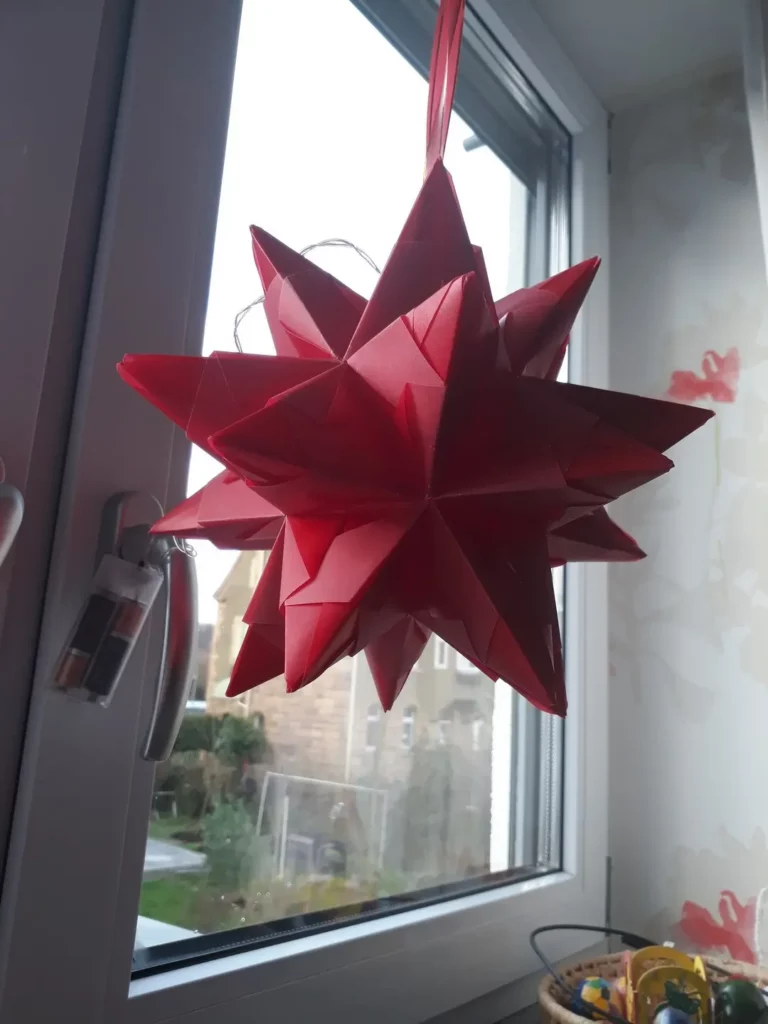
Fertig! Fast.
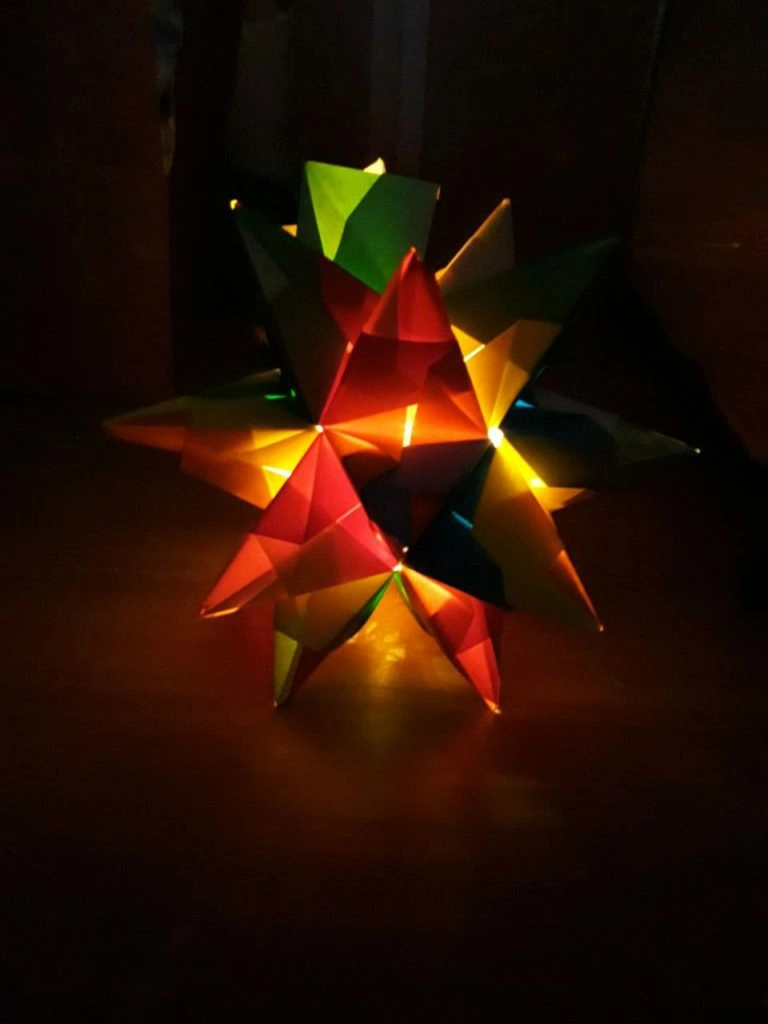
Beleuchtung
There are now many small LED fairy lights on batteries. That costs only a few euros. Put the lights inside. Leave the controls outside. Attach it to the star itself or next to it and mask the cable, for example, with chenille wire.
I try to light my star. The result is not bad, but as if suppressed.
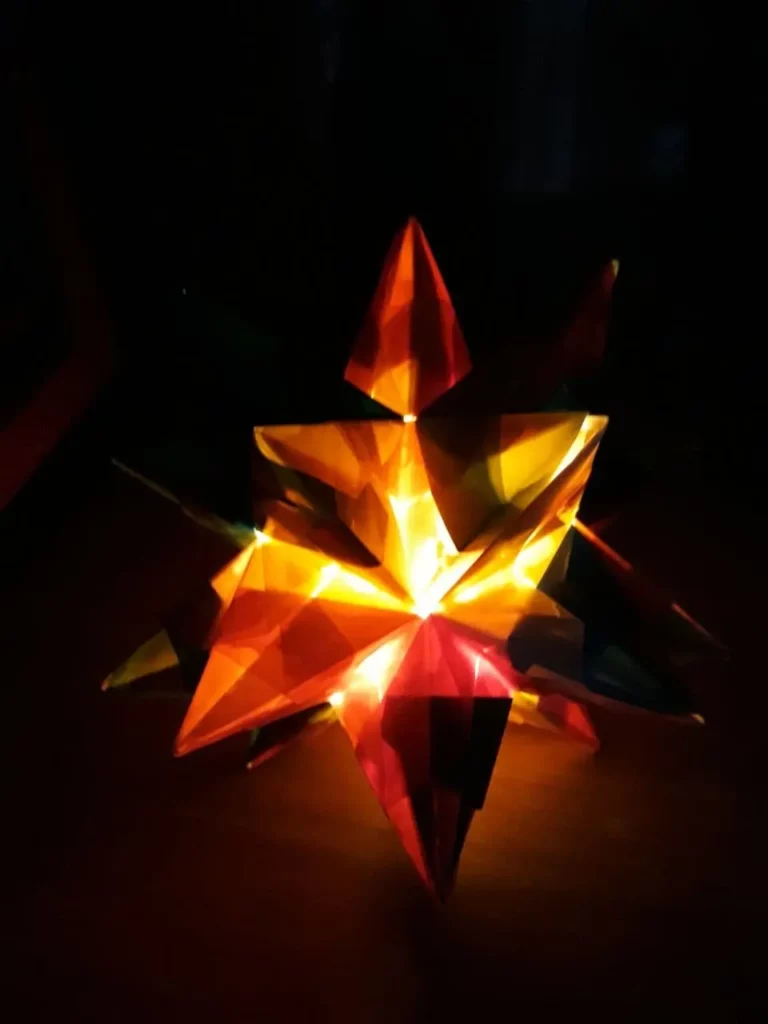
And now little trick. Take oil – and – after 40 Minutes of oiling –
– our star shines as if it were made of transparent paper or maybe even better. There are a few things to consider:
- green and blue always shine badly
- the darker colors from below become visible when the top layer is light.
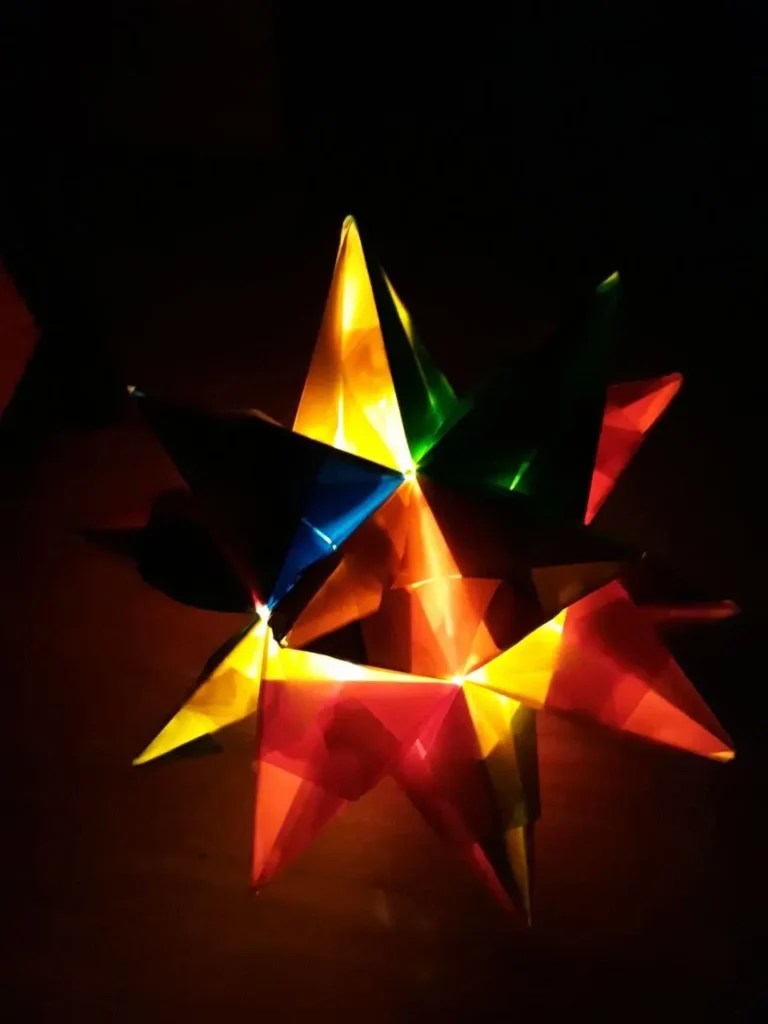
Because my star is made of thin sheets of construction paper, I add another layer of Art Potch or a varnish.
A comparison with my other star from Aldi’s sheets (it was a set like this one, only with two stars 15×15 cm).

Aurellio Star
The star Aurelio has a very similar shape. It also consists of 30 modules, but they fold a little differently.
It is easier to put the “wing” in the “pocket” because they are only a little bit on top of each other – in contrast to Bascetta, where the details come together 2/3.
But you don’t need to glue Bascetta. It’s very stable. In contrast, with Aurelio the “wing” has to be fixed in the pocket with glue. At the same time, the Aurelio’s points are smooth while the complex structure of the Bascetta is visible.
All posts about #DIY
All posts about #German traditions
Do you enjoy the site without cookies and maybe without ads? This means that I work for you at my own expense.
Perhaps you would like to support my work here.
Or Cookie settings change: round sign bottom left
thank you!! i have finally completed my star thanks to your tutorial. now my christmas will be complete. 🙂
Great, I’m glad the instructions were helpful. I wish you a good Advent!